Procedure
1. Click on the Edit button from the Non-Conformance list page.

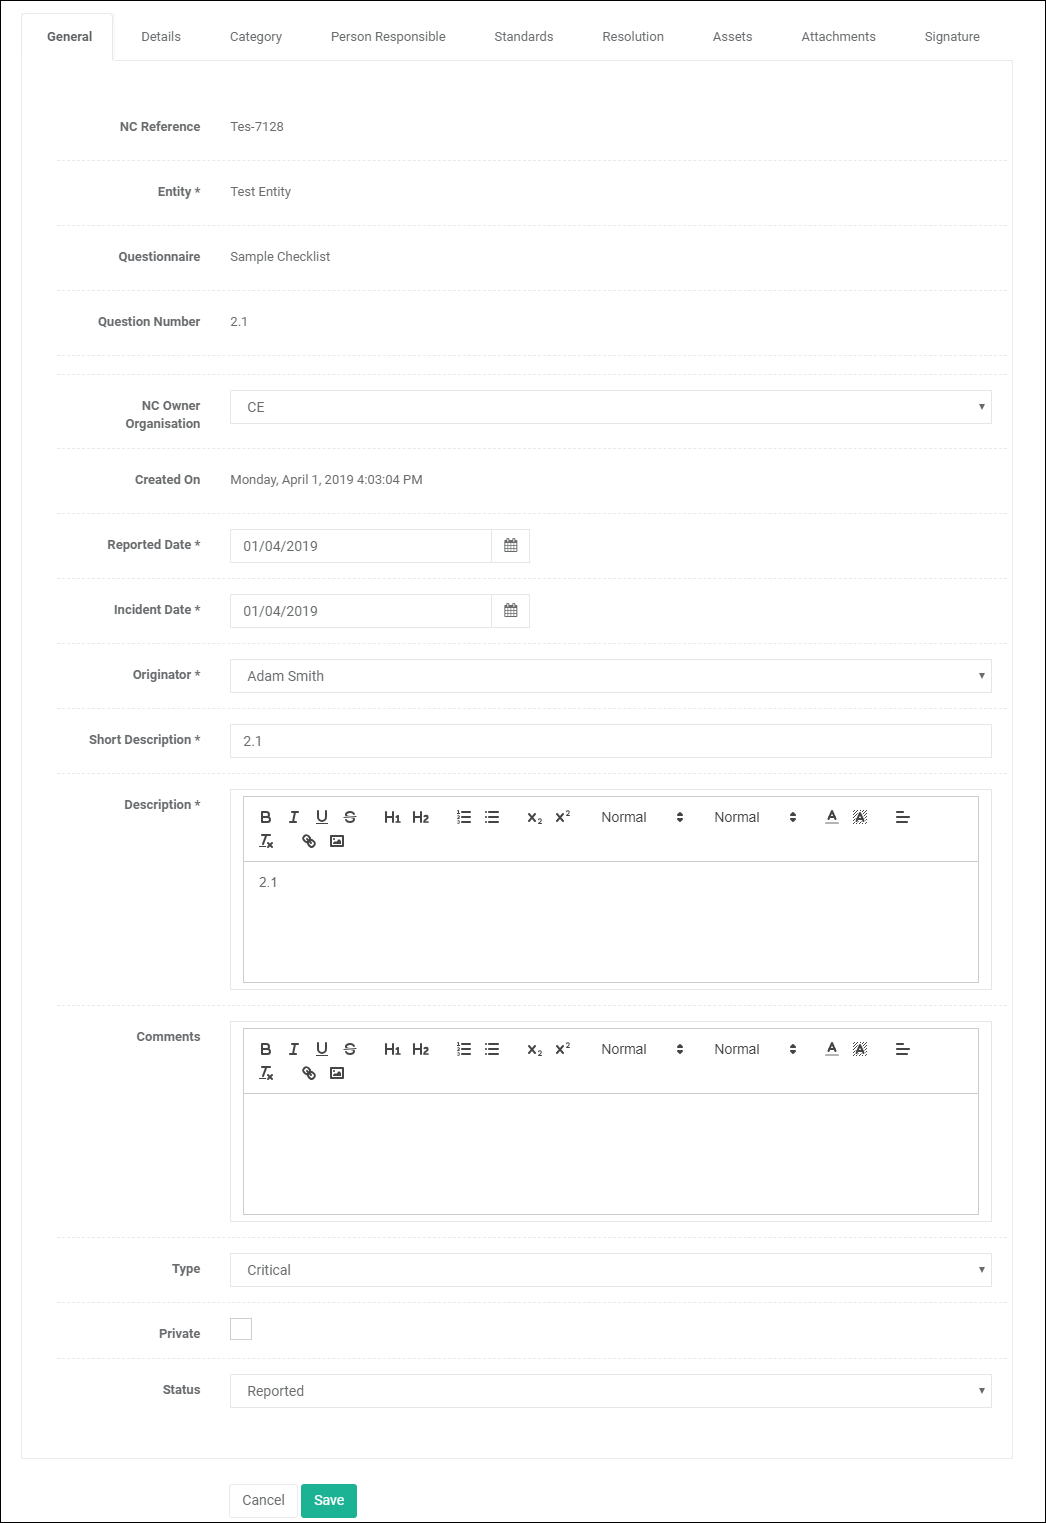
2. The Edit Non-Conformance page is displayed.

3. In the General tab, set the following mandatory fields:
a.Entity. Choose the Entity for which to raise the NC.
b.Reported Date. Choose the date of the NC using the calendar (must be the same or later than the Audit Date).
c.Incident Date. Choose the date of the incident using the calendar.
d.Originator. By default, the name of the Auditor is inserted automatically.
e.Short Description. Enter up to 20 characters as a short description of the NC.
f.Description. Edit as required to describe the NC. Depending upon application settings, the system may import the Observation from the Questionnaire into this field and/or export changes to this field into the Observation field.
4. In the General tab, set the remaining optional fields as required:
a.Comments. Enter comments as required.
b.Type. Select from the list of available NC Types to indicate NC severity.
c.Private. Select this option to restrict visibility of the NC to members of the same Auditor Organisation.
d.Status. Select from the list of available Statuses as appropriate.
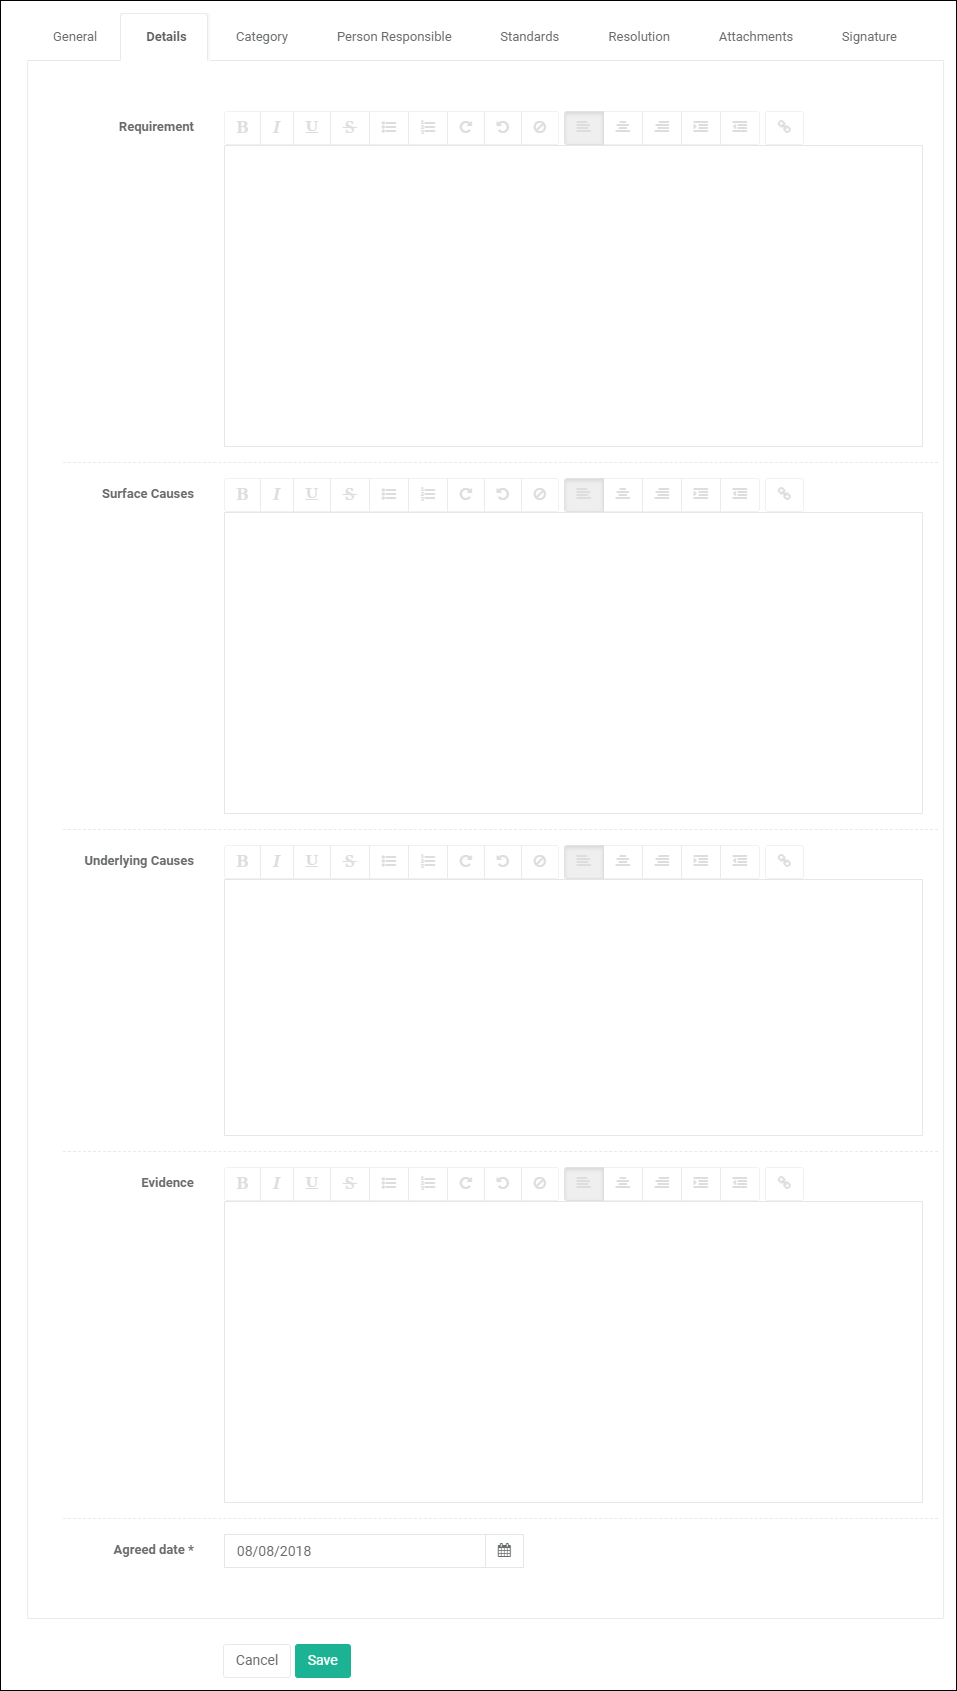
5. In Details tab, set the following fields as required:
a.Requirement. Edit as required to describe the requirement. By default the system imports the Question text from the Questionnaire into this field.
b.Surface Causes. Edit as required. By default this is blank as this step usually takes place after investigation.
c.Underlying Causes. Edit as required. By default this is blank as this step usually takes place after investigation.
d.Evidence. Edit as required to describe any additional Evidence regarding the NC. Depending upon application settings, the system may import Notes from the Questionnaire into this field and/or export changes to this field into Notes.
e.Agreed Date. Choose the completion date for resolution using the calendar control.

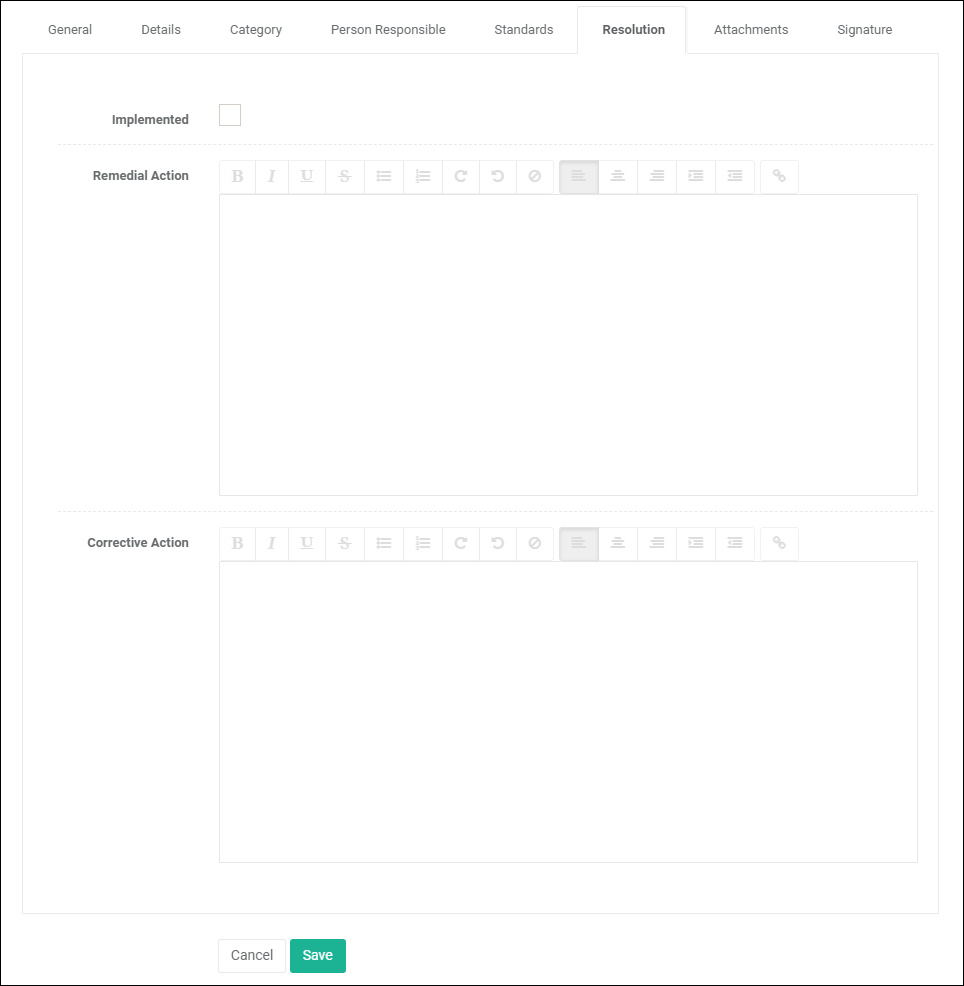
6. On the Resolution tab, set the following fields as required:
a.Implemented. Click the checkbox if implemented.
b.Remedial Action. Enter the remedial action to be implemented. (Depending on configuration, text entered as a Comment in the Questionnaire will be imported into this field. Similarly, changes made in the NC will be reflected in the Questionnaire).
c.Corrective Action. Enter the corrective action taken.

7. Click on the ![]() button to save the changes and create the Non-Conformance.
button to save the changes and create the Non-Conformance.
Notes
Some of the fields are available based on required permissions assigned to the User.
To fill further details of the Non-Conformance:
•Please visit Assign Category to Non-Conformance for more details to assign a Category to a Non-Conformance.
•Please visit Assign Person Responsible to Non-Conformance for more details to assign a Person Responsible to a Non-Conformance.
•Please visit Add Standards to Non-Conformance for more details to add a Standards to a Non-Conformance.
•Please visit Add Attachment to Non-Conformance for more details to add Attachments to a Non-Conformance.
•Please visit Add Signature to Non-Conformance for more details to add Signature to a Non-Conformance.
•Please visit Add Asset to Non-Conformance for more details to add Assets to a Non-Conformance.